Labels for Safety, Visuals and Facility ID Desktop Printers
Labels for Product, Wire and Lab ID Benchtop Printers
Labels for Safety, Visuals and Facility ID Desktop Printers
Labels for Product, Wire and Lab ID Benchtop Printers
Safety and Facility ID Desktop Printers
Product, Wire and Lab ID Benchtop Printers
Barcode Scanner and Printer Kits
Barcode Scanner and Printer Kits
PaintStripe Floor Marking Stencils
Valve Lockouts & Hose Lockouts
Group Lock Boxes & Permit Control
Brady Safety Lockout Tagout Services
Pipe Marker Accessories & Mounting Brackets
Maintenance and Production Tags
Calculators and Assessment Tools
Product Finders and Data Sheets
Laboratory safety is of paramount importance; not only to ensure the well-being of personnel, but also to preserve the integrity of the research. One crucial aspect of maintaining safety is the use of lab safety symbols. These symbols provide clear and concise visual cues that help identify potential hazards and how to mitigate them. This guide will help you effectively understand these symbols, creating a safer environment for all.
Laboratory safety symbols are essential for preventing accidents and promoting a safe working environment. OSHA requires labs to provide safety symbols in environments where hazardous chemicals are present. There are many different types of safety symbols in labs, each with its own meaning. Some of the most common symbols include:
These symbols identify chemicals that are flammable, corrosive, toxic, or otherwise hazardous.
A flame symbol is used to warn personnel that there are flammable materials or chemicals in the area. It can also mean that these hazardous materials may emit flammable gas or self ignite when exposed to water or air. Anyone working with a flammable substance should wear eye protection and handle it with care.

The corrosive symbol indicates the presence of chemicals that are strong enough to corrode skin or surfaces upon contact. Personal protective equipment (PPE) — including special gloves, eye protection and lab coats — should always be worn, and working surfaces should be chemical resistant.

A skull and crossbones represents a substance that’s poisonous or has an immediate and severe toxic effect. These chemicals can be fatal after just one exposure so it’s crucial to wear proper PPE, including a respirator, to prevent serious harm.

These symbols identify biological materials that could pose a risk to human health such as bacteria, viruses, bodily fluids and other microorganisms.
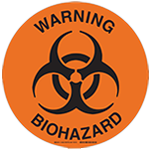
The biohazard symbol is commonly placed in larger areas of a lab that either contain or are exposed to biohazards. It can also be used to indicate where to put waste that contains biological materials or infectious agents. Proper protection and decontamination of exposed equipment is a must in these areas.
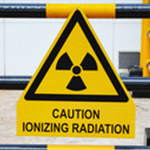
Some lab equipment can emit radiation, which can cause burns or even radiation poisoning after prolonged exposure. The ionizing radiation symbol is placed by equipment like an x-ray apparatus, medical beam cannons or particle accelerators as a warning; and lab personnel should be properly trained and protected before operating.
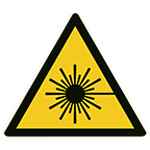
This symbol indicates the presence of laser beams that have the potential to damage eyes, skin and even clothing with direct exposure. Protective eyewear is required and, in some cases, fire-retardant clothing is necessary to keep everyone safe.
These symbols identify physical hazards such as high voltage, slip hazards, and hot surfaces.
A lighting bolt symbol means a piece of equipment has a high enough voltage to seriously — maybe fatally — injure staff. Anyone using this equipment should be properly trained and wear rubber gloves to avoid electrocution.

This symbol is used to mark areas that pose the risk of slipping or tripping. It serves as a reminder for personnel to proceed with caution.

The hot surface symbol warns lab personnel of potential harm from hot surfaces. In a lab, this hazard could come from lab ovens or autoclaves, and heat-resistant PPE should always be worn.

These symbols identify materials that are explosive or have the potential to oxidize.
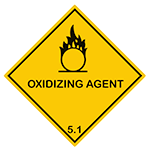
This symbol represents the presence of chemicals that have the potential to intensify fires, cause explosions, and may be toxic or corrosive. Since they provide oxygen to flammable substances, these chemicals should always be stored separately and handled with care.
Any chemical with explosive properties will have this symbol. The explosion hazard can come from a variety of reasons including high heat, self-reactive substances or environmental conditions.

In addition to the primary lab safety symbols, there are a number of additional symbols and laboratory labels that are common in a laboratory setting. These symbols typically provide information about specific entry requirements, the location of safety equipment and other important safety information.
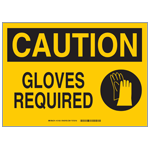
This symbol indicates that gloves must be worn when working in a particular area. Be sure to wear the appropriate glove designed for that specific hazard — chemical resistant, heat resistant, disposable, etc.
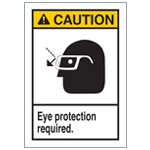
This symbol indicates that eye protection, such as safety glasses or goggles, must be worn when working in a particular area. In a lab, eye protection is used for a variety of reasons from chemical splashes to flying debris to harmful UV radiation from lasers.
This symbol indicates that a lab coat must be worn when working in a particular area. Depending on the hazard, lab coats are made of different materials that are designed to be flame retardant, resist chemical spills or offer protection from biological materials.

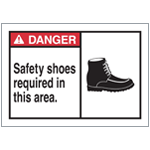
This symbol indicates that closed-toe shoes must be worn when working in a particular area where there’s a danger of falling or rolling objects. There may also be electrical hazards at the ground level that require proper foot protection.
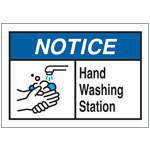
This symbol indicates the location of a hand wash station, which is important to prevent contamination, maintain a clean environment and comply with regulations.
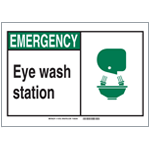
This symbol indicates the location of an eye wash station so personnel know where to go for immediate first aid for eye injuries or to flush out harmful chemicals.
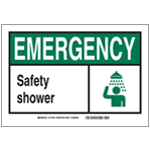
This symbol indicates the location of a safety shower in case of chemical spills or fires. If a chemical comes into contact with the skin, the safety shower can be used to quickly rinse off the chemical, preventing serious injury. Safety showers are typically located near hazardous chemical storage areas and work areas where chemicals are used.
This symbol indicates the location of a fire extinguisher, which needs to be located quickly to prevent fire spread, protect equipment and research, ensure personnel safety and provide immediate response before firefighters arrive.

This symbol indicates the location of a first aid kit. Labs require first aid kits to treat minor injuries, respond to chemical spills, handle medical emergencies and promote a safe working environment.

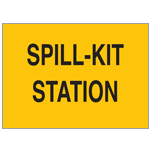
This symbol indicates the location of a spill kit to clean up hazardous material spills. These kits contain absorbent materials to help contain spills, and personal protective equipment to quickly protect lab personnel and the environment.
Understanding how to read and implement safety signage is essential for keeping lab personnel safe. Here are some guidelines for using and placing safety symbols:
Looking for more related information for lab safety symbols and workplace safety symbol standards? Check out our guide to workplace safety signs and symbols.
When working with symbols, it’s important to avoid certain mistakes that could lead to confusion or errors. By avoiding these common mistakes, you can ensure that symbols are used effectively and accurately in your lab:
Laboratory safety symbols are essential for preventing accidents and promoting a safe working environment. By understanding and following these symbols, laboratory workers can help to protect themselves and others from harm.
By staying vigilant and prioritizing safety in the laboratory, you can create an environment where accidents are minimized, and research activities can be conducted safely and efficiently. Remember, laboratory safety symbols are not mere decorations but vital tools that safeguard the health and well-being of everyone in the lab.
Brady has a variety of products that can help create lab efficiencies and further safety efforts. Look for these Brady products to meet the unique safety needs of your lab.

Our safety sign selection includes signage for biohazard and hazardous materials, electrical safety,and more! Many of these signs are OSHA/ANSI compliant allowing you to be properly prepared for safety inspections.
Shop Safety Signs
Chemical and hazardous materials labels will allow you to quickly identify dangerous materials and keep your employees safe from harm. Browse our selection of GHS, Right-to-Know, shipping, PB Free and WEEE RoHs compliant labels.
View Hazardous Material Labels
With the power of automatic LabelSense™ print technology, the J7300 stands ready to print whatever you need at a moment's notice.
Automate Laboratory Labeling
Technology. It’s ever evolving. And automation plays a key role in streamlining many business and manufacturing processes. But automation goes broader. Laboratories look to automating processes to help them streamline sample prep and reduce manual work.
Optimize your lab workflow
When considering information in the lab, almost everything involves identification. From patient data to expiration dates on chemicals, we rely on labels. Without them, it would be next to impossible to perform lab tests, identify batches, determine which equipment has been sterilized … and the list goes on.
Learn what to label in a lab
Precise and accurate lab sample management is not a nice-to-have in scientific research and analysis – it’s a must-have. Each lab sample holds vital information, a critical result, a potential breakthrough or more. And all it takes is a single bad label, mishandle or lost-in-the-shuffle moment to lead to disaster.
Best practices for lab management